This tutorial is based on need. I needed this info earlier today, and I had to sort through about a half dozen sites to find all of this information. The scenario is as follows: I was tasked with creating an animated movie that has a layer of transparency. My client did not know what color they were going to use as their background for the site, but they wanted an animated movie to transition into showing their logo. Knowing this was my task I then posed two questions; How do I get a movie to render with an alpha layer in After Effects? Also, can that transparent movie be put into Flash and published in Flash all the while maintaining the transparency?
 To Start we open up After Effects and create a new Composition. To ensure that we have no background layer toggle the Transparency Grid so that you get a “waffle background” which will look the same as when you are working with a transparent background in Photoshop.
- Next just go crazy in After Effects and create your movie. For this example I just put two different text elements onto the composition and gave them both a little big of animation. After Effects allows you to import assets, so if you create a very nice background of image in Photoshop that was you want to use, just go to File -> Import -> File… and bring in anything you want to use.
- Once your movie is created you will want to render it so that you can use it in Flash. To render your video go to Composition -> Add to Render Queue
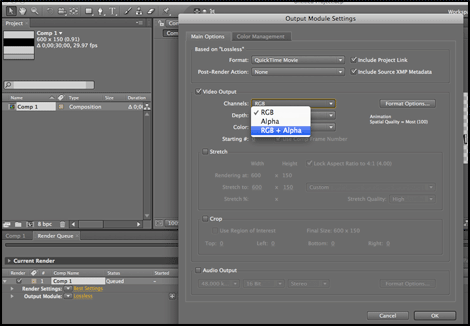
- Now that you are in the Render Queue locate Output Module, and click on the yellow text next to it to bring up the Output Module Settings. Go to Video Output and make sure that under Channels, RGB+Alpha is selected and that you Depth is Millions of Colors+. Those two settings are key to making sure you get a transparent movie.

- Since we are working with Flash after this we want to set our Format to FLV. Now that we’re done with that we want to hit the OK button. Last, make sure you video has a title under Output To on the main Render Queue tab and finally to render the video hit the Render button in the upper right of the Render Queue.
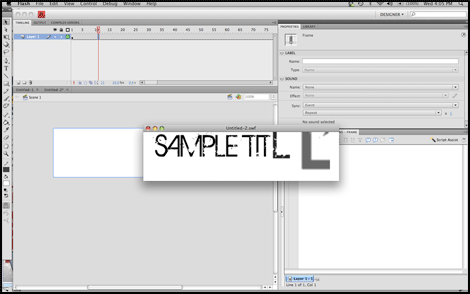
- Now close out of After Effects and open up Flash. You will want to create a new file. Once you get your new file you will want to go to File -> Import -> Import Video… to bring in your video you just created. Browse to your video, then make sure to choose “Embed FLV in SWF and play in timeline”. Now hit OK and your video will be brought into your Flash file.
- Your stage may appear to be blank but this is because you video plays out along the timeline. To view your video scrub across the timeline, or hit CTRL + Enter to view the SWF.

- The final step to this whole process is publishing the Flash file. To make sure we preserve the transparency, go to File -> Publish Settings… Click on HTML to get the HTML Settings. Under Window Mode select Transparent Windowless. Now just hit the Publish button and your SWF and HTML file will be published with movie in it. Now no matter what image you set as your background, or background color you choose, it will show through.


Wow.
What a timely post. Fortunately, when I went to start searching it didn’t take nearly as long! My Flash counterpart and I thank you.